Thursday, December 25, 2008

Worm - WYAutoIT Sohanad Imaut Variant REMOVAL

Worm - WYAutoIT Sohanad Imaut Variant REMOVAL

Symptoms:

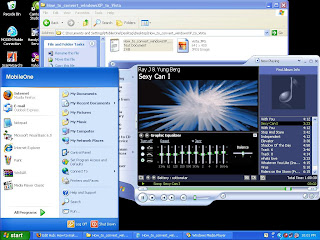
> There is an AutoIT script error which appears very oft (Screenshot attached)

Line 0 (File "C:\Windows\system32\SVCIICHOST.exe");
$mang[$i] = "\\" & $read
^ ERROR
Error: Array Variable has incorrect number of subscripts or subscript dimension range exceeded.

> the following entries are detected by HijackThis

F2: REG:system.ini: Shell=Explorer.exe SVIICHOST.exe

D4: HKCU\..\Run: [Yahoo Messengger] C:\windows\system32\SVIICHOST.exe
further to symantec / sophos detail i chekced up for new folder.exe and this is there

HKEY_CURRENT_USER\Software\Microsoft\Windows\CurrentVersion\Explorer\WorkgroupCrawler\Shares
Value: "shared" = "\New Folder.exe"

> There is a scheduled task entry which enables SVIICHOST.exe to run daily
c:\windows\tasks\AT1.* is found.

> Task Manager and Registry Editor are disabled.

> SVIICHOST.exe is found running as an active process.

> During an online scan, ClamAV is supposed to detect it but clamwin 0.94.1 or WinClamavShield latest version doesnt detect it.

> It creates exe files in the name of all the folders opened just like any other autorun type worms.thereby spreading very easily through removable drives (thats how my colleague got it in first place)

> While runing messenger there is strange messages broadcasted every now and then.

> host of file names reported is available here - http://www.threatexpert.com/threats/w32-yautoit.html shows how variable and masquerading this is . threat levelmight be low but just a while ago i logged on to our storage server and it is fully infected with the folder name.exe files....

> broadcasts messages ilke this to all of your messenger contacts..

"E may, vao day coi co con nho nay ngon lam http://nhattruongquang.0catch.com

"Vao day nghe bai nay di ban http://nhattruongquang.0catch.com"

"Vao day nghe bai nay di ban http://nhattruongquang.0catch.com"

"Biet tin gi chua, vao day coi di http://nhattruongquang.0catch.com"

"Trang Web nay coi cung hay, vao coi thu di http://nhattruongquang.0catch.com"

"Toi di lang thang lan trong bong toi buot gia, ve dau khi da mat em roi? Ve dau khi bao nhieu mo mong gio da vo tan... Ve dau toi biet di ve dau? http://nhattruongquang.0catch.com"

"Khoc cho nho thuong voi trong long, khoc cho noi sau nhe nhu khong. Bao nhieu yeu thuong nhung ngay qua da tan theo khoi may bay that xa... http://nhattruongquang.0catch.com"

more error messages may be there on the syste,..

To remove! Just follow the Standard Removal Procedure Guide

Sunday, December 7, 2008

Standard Procedure on removing virus,spyware,malware and trojans

Standard Procedure to Remove Virus,Trojan, Malware, Spywares from windows! - proven and tested on I.T department, internet cafe's, offices and homes

Follow this Guide.

1.) Download This files and removal Tools needed!
Download Combofix
Download ATF cleaner
Download COMODO FIREWALL With AntiVirus
(this are all the tools you needed) if theres and update i will update this guide..Please leave a comment or questions then you can post to our forum if you need help on something.

2.) After Downloading all files - Unplug your network or your wireless connection, make sure you are not connected to the network.. just to be safe.

Some infections will put malicious lines into your hosts files. We will reset your hosts file with HostGuard. but you can use this later.

2.) (You can skip this Part) and go to step 3.
* download HostGuard.zip to your desktop and unzip the contents. hostguard can be downloaded here at haktech
* Install HostGuard
* Run HostGuard and Click Fix Windows Host - this will fix Your Windows Host
* Close or Hide HostGuard
(You can skip this part)

If you or SpyBot-SD have added modifications to your hosts file, they will need to be re-added
Or you can use the HostGuard to Guard your Windows Host this is much better..

3.) Run ATF-Cleaner Clean All Click main and Checll All and click Empty Selected, then if you have Mozilla Firefox Click FireFox and Select All then Click Empty Selected and also for opera if you have it in your system. (NOTE: Just to make sure. but you can skip this part if you want)

4.) # Close any open browsers before we can start removal process.
# Close/disable all anti virus and anti malware programs so they do not interfere with the running of ComboFix

* Now Make Sure all windows are close and no browser is open.and also make sure you are unpluged from the network and
if you are using wireless make sure you have turn it off.

combofix will search and remove all known threats, so keep your combofix updated!

Restart your computer after completing these steps.
this will remove Explorer.exe

(remember to send a thanks ;) )
Guide Copyright by Mark Sheldon Wong
Http://haktech.blogspot.com
Area51.Network - Nsfive.Net
Webcargo.Networks

Saturday, November 1, 2008

How to make WindowsXP to Vista without paying for upgrade?

How to make WindowsXP to Vista without paying for upgrade?

From Windows XP 


Upgrade to Vista

Are you tired of your old windows XP apearance/interface?

if you are then follow this hubpage and http://hacktech.blogspot.com tutorial
i made to convert your Windows XP to Vista..
Vista Transformation will give to your Windows XP system
the new and cool look of Microsoft's Windows Vista.
The pack changes most of the system icons, skins and toolbars
and also adds new enhancements to your desktop such as a dock bar or
a different system tray clock.
It is free and does a great job of giving machine a new Vista look.

System Requirements:

DOTNET FRAMEWORK
• 500mb or more disk space
Windows Vista SP2 or SP1 only.

Convertion Changes:
• Boot screen
• Welcome Screen / Logon Screen
• New msstyles files (visual styles)
• New desktop and file icons
• New toolbar icons
• Progress Dialogs
• Sounds scheme
• System Tray icons
• New Wallpapers
• Windows Media Player Skins


now follow these simple steps.

1.) download the Installer from this website.

Download here!


2.) after downloading. Run the installer and install.

3.) Now asuming you have installed the transformation pack.restart your computer
and wellcome to your new Vista look.

see how easy it is to make windowsxp to Vista..have fun..

Thursday, October 23, 2008

HostGuard - Windows Host Protection Utility

HostGuard - Windows Host Protection Utility
HostGuard will protect and guard you against spyware,malware and harmfull website before it gets you.
host guard has an option that will auto fix your host data while you suspect Virus,Spyware,Trojan,malware on your system, you can use HostGuard Auto Fix option while you are on the process of cleaning your system against this virus,trojan, malwares and spywares, hostGuard is a freeware. made by Mark Sheldon Wong.

Update and Definition files will be also available here for
Download as soon as it is available.


Download HostGuard
Download Link1, Download Link2

Note: if you can run or install ost Guard you may need to
download this Complete Installer Package
.
Complete Installer Download Click here


How to remove Win32:Murlo-CH [Trj] Removal Instruction

Win32:Murlo-CH [Trj] Removal Instruction

1.) Download This files and removal Tools for Win32:Murlo-CH [Trj]
Download Combofix http://download.bleepingcomputer.com/sUBs/ComboFix.exe
Download HostGuard
, HostGuard Download Link2 , Host Guard Complete Installer


* Download This Complete Offline
Win32:Murlo-CH [Trj] Removal Guide and tools with CFScript and HostGuard and ATF-Cleaner

*Alternate Download Link

2.) After Downloading - first we will reset Windows host file in order to Remove Win32:Murlo-CH [Trj]
but before doing so.. Unplug your network or your wireless connection, make sure you are not
connected to the network..

Some infections will put malicious lines into your hosts files. We will reset your hosts file with HostGuard.

* Please download HostGuard.zip to your desktop and unzip the contents.
* Install HostGuard
* Run HostGuard and Click Fix Windows Host - this will fix Your Windows Host
* Close or Hide HostGuard

If you or SpyBot-SD have added modifications to your hosts file, they will need to be re-added
Or you can use the HostGuard to Guard your Windows Host this is much better..


3.) Run ATF-Cleaner Clean All Click main and Checll All and click Empty Selected, then if you have
Mozilla Firefox Click FireFox and Select All then Click Empty Selected and also for opera if you have
it in your system.


4.) Running CFScript.txt with ComboFix to remove Win32:Murlo-CH [Trj]
# Close any open browsers before we can start Win32:Murlo-CH [Trj] removal process.
# Close/disable all anti virus and anti malware programs so they do not interfere with the running of ComboFix
if you have downloaded the CFScript then you must have them now in your desktop with COMBOFIX.EXE

CFScript.txt
- you can manualy create CFScript.txt, open notepad and copy the text below.


KILLALL::
File::
C:\WINDOWS\trz742.tmp
C:\WINDOWS\system32\trz740.tmp
C:\WINDOWS\system32\trz73F.tmp
C:\WINDOWS\system32\trz73E.tmp
C:\WINDOWS\system32\trz73D.tmp
C:\WINDOWS\system32\trz73C.tmp
C:\WINDOWS\system32\HBQQFFO.dll.$DIS
C:\WINDOWS\system32\explore.exe
C:\WINDOWS\system32\HBCT.dll
C:\WINDOWS\system32\HB1000Y.dll
C:\WINDOWS\system32\HBSOUL.dll
C:\WINDOWS\system32\HBFY.dll
C:\WINDOWS\system32\HBQQFFO.dll
C:\WINDOWS\system32\kildh3l.dll
C:\WINDOWS\system32\wllame.dll
C:\WINDOWS\system32\catower.dll
C:\WINDOWS\system32\comboaus.dll
C:\WINDOWS\system32\pewire.dll
C:\WINDOWS\system32\aotoppt.dll
C:\WINDOWS\system32\johandy.dll
C:\WINDOWS\system32\jolndyo.dll
C:\WINDOWS\system32\micsus.dll
C:\WINDOWS\system32\cupops.dll
C:\WINDOWS\system32\System.exe
C:\WINDOWS\system32\HBQQSG.dll
C:\WINDOWS\system32\lensch.dll
C:\WINDOWS\system32\yulhodpf.dll
C:\WINDOWS\system32\eskislk.exe
C:\WINDOWS\system32\eskisl.dll
C:\WINDOWS\Update.dll

Registry::
O21 - SSODL: sysocmgr - {DA1DE019-A6A8-ED40-4B87-248B2A93DE99} - C:\WINDOWS\sysocmgr.dll
O21 - SSODL: yulhodpf.dll - {434FA69C-5F0A-42e1-82B8-10AF2C8E53C6} - C:\WINDOWS\system32\apoebqrg.dll
O21 - SSODL: ehhzzeza.dll - {EB9660D8-E1CD-4ff0-B4A9-00CD907F928A} - C:\WINDOWS\system32\ehhzzeza.dll
O21 - SSODL: ljpzxdum.dll - {71A78CD4-E470-4a18-8457-E0E0283DD507} - C:\WINDOWS\system32\ljpzxdum.dll
O21 - SSODL: ssawfayn.dll - {D3112B69-A745-4805-874E-ABD480EA1299} - C:\WINDOWS\system32\ssawfayn.dll
O21 - SSODL: apoebqrg.dll - {434FA69C-5F0A-42e1-82B8-10AF2C8E53C6} - C:\WINDOWS\system32\apoebqrg.dll
O21 - SSODL: lmpsxxfz.dll - {2CB77746-8ECC-40ca-8217-10CA8BE5EFC8} - C:\WINDOWS\system32\lmpsxxfz.dll
O21 - SSODL: ifyshalr.dll - {F0930A2F-D971-4828-8209-B7DFD266ED44} - C:\WINDOWS\system32\ifyshalr.dll
O21 - SSODL: avicapwm.dll - {6B9FEAD7-4319-4312-AB05-D8C9CD255BFE} - C:\WINDOWS\system32\avicapwm.dll

[HKEY_LOCAL_MACHINE\Software\Microsoft\Windows\CurrentVersion\Run]
"3PMmUpdate"=-
"HBService32"=-
"HBService"=-

[HKEY_LOCAL_MACHINE\SOFTWARE\Microsoft\Windows\CurrentVersion\Explorer\ShellExecuteHooks]
"{434FA69C-5F0A-42e1-82B8-10AF2C8E53C6}"=-
"{EB9660D8-E1CD-4ff0-B4A9-00CD907F928A}"=-
"{71A78CD4-E470-4a18-8457-E0E0283DD507}"=-
"{D3112B69-A745-4805-874E-ABD480EA1299}"=-
"{2CB77746-8ECC-40ca-8217-10CA8BE5EFC8}"=-
"{F0930A2F-D971-4828-8209-B7DFD266ED44}"=-
"{6B9FEAD7-4319-4312-AB05-D8C9CD255BFE}"=-


*After copying paste and save the file CFScript.txt

* Now Make Sure all windows are close and no browser is open.and also make sure you are unpluged from the network and
if you are using wireless make sure you have turn it off.
* Now we will start to remove Win32:Murlo-CH [Trj] removal process

* Now drag and drop CFScript.txt to COMBOFIX


Restart your computer after completing these steps.
this will remove Win32:Murlo-CH [Trj]


Guide Copyright by Mark Sheldon Wong
Http://haktech.blogspot.com
Area51.Network
Webcargo.Networks

Tuesday, October 21, 2008

Removing System.exe Trojan

Download And Install
1.) Spybot search and destroy
2.)Avast! Antivirus
3.) Comodo registry Cleaner. -> Delete the 3PMmUpdate entry from the startup..

Fix your HOST file.,Download this http://www.funkytoad.com/download/hoster.zip

Another way to remove the Trojan is ->>
Make Sure Internet Explorer is NOT open when trying this)

Launch HijackThis, click the 'Open'Misc Tools'Section -> 'Open hosts file manager'. Delete every line (select each line and click 'Delete line(s)') except the very first top lines beginning with # and: 127.0.0.1 localhost


Once finished, click the 'Open in Notepad' button. It should look like this:


QUOTE
# Copyright © 1993-1999 Microsoft Corp.
#
# This is a sample HOSTS file used by Microsoft TCP/IP for Windows.
#
# This file contains the mappings of IP addresses to host names. Each
# entry should be kept on an individual line. The IP address should
# be placed in the first column followed by the corresponding host name.
# The IP address and the host name should be separated by at least one
# space.
#
# Additionally, comments (such as these) may be inserted on individual
# lines or following the machine name denoted by a '#' symbol.
#
# For example:
#
# 102.54.94.97 rhino.acme.com # source server
# 38.25.63.10 x.acme.com # x client host

127.0.0.1 localhost

After the above:

Run hijackthis. Hit None of the above, Click Do a System Scan Only. Put a checkmark/tick in the box on the left side on these:

O4 - HKLM\..\Run: [Alcmtr] ALCMTR.EXE
O4 - HKLM\..\Run: [HBService32] System.exe
O4 - HKLM\..\Run: [3PMmUpdate] rundll32 "C:\WINDOWS\Update.dll",Main
O4 - HKLM\..\Run: [WinSysW] C:\WINDOWS\940477L.exe
O4 - HKLM\..\Run: [UserFaultCheck] %systemroot%\system32\dumprep 0 -u

Close ALL windows and browsers except HijackThis and click "Fix checked"


Delete these Files if listed:
C:\WINDOWS\940477L.exe

Reboot

------------------------------------------End of File-----------------------------------------

Worms / Viruses


Date
Title


10/09/2008
Win32/Lolyda Family
Aliases: Infostealer.Lineage (Symantec), PWS:Win32/Lolyda (MS OneCare), Trojan-GameThief.Win32.OnLineGames (Kaspersky)


10/09/2008
Win32/Lolyda.BZ
Aliases: PWS:Win32/Lolyda.K (MS OneCare), Infostealer.Onlinegame (Symantec), Trojan-GameThief.Win32.OnLineGames.thlh (Kaspersky)


10/09/2008
Packed.Generic.190
Aliases: none known


10/09/2008
Packed.Generic.189
Aliases: none known


10/08/2008
Trojan.Hexzone
Aliases: none known


10/07/2008
not-a-virus:NetTool.Win32.Transmit.a
Aliases: SPR/Transmit.A


10/07/2008
Trojan-Downloader.JS.Agent.bxr
Aliases: none known


10/07/2008
Worm.Win32.AutoRun.bnb
Aliases: none known

Good article on a recent "Spear phishing" attack on LinkedIn users

10/07/2008
Trojan.Win32.ConnectionServices.e
Aliases: none known


10/06/2008
Win32/Starimp.AX
Aliases: FakeAlert-AB.dr (McAfee), Troj/Agent-HRF (Sophos), Trojan.Fakeavalert (Symantec)

update new patches friend...

boot your computer on dos scan your memory for viruses...

(Avast and mcafee can clean this)

Friday, September 26, 2008

Windows Vista Internet Connection Sharing

Windows vista and XP internet connection sharing.


Internet Connection Sharing (ICS) enables a Windows computer to share its Internet connection with computers on local area networks. It's been around since Windows 98 SE, and with the launch of Windows XP, it's only gotten better.

Windows Vista or XP ICS has some notable advantages over the versions of ICS in Windows 98 Second Edition and Windows Me:
It's easier to set up. There's no software to install, and it doesn't add any network components or protocols. 
It's much more reliable and much less likely to cause network problems.
You can create a Network Bridge connecting two or more local area networks and share the Internet connection with the computers on all of them. This is especially useful if your XP computer is connected to both a wired and wireless network.
ICS client computers can use XP's Internet Gateway to monitor and control the server computer's Internet connection. If you have a dial-up connection, you can connect and disconnect when deciding whether to enable ICS.

However, XP ICS is missing some features of those earlier versions. You can't disable the DHCP server, change the server computer's IP address, or change the range of addresses allocated by the DHCP server. 

Consider these points when deciding whether to enable ICS.

WARNING #1: When you enable ICS, the network adapter connected to the local area network is assigned a static IP address of 192.168.0.1. The client computers are assigned other IP addresses in the 192.168.0.x range. These addresses may not be compatible with an existing network

WARNING #2: Don't enable ICS if any computer in your network is configured as a domain controller, DHCP server, or DNS server. Don't enable it if another computer is running ICS or Network Address Translation (NAT).

WARNING #3: To enable ICS, you must be logged on as a user that is a member of the Administrators group.

WARNING #4: If you establish a Virtual Private Networking (VPN) connection while sharing a different connection, the client computers won't be able to access the Internet until the VPN connection is ended.
Preparing for ICS 

The ICS server computer must have two network connections: one for the Internet, and one for the local area network. The Internet connection may be a dial-up (PPP or ISDN), cable modem, DSL, or other broadband Ethernet connection. The LAN connection may be a wired, wireless, or even a USB Ethernet connection. Before enabling ICS:
Set up your Internet connection and test it so that you know you can connect to the Internet.
Decide whether to allow client computers to control the server's Internet connection using the Internet Gateway. This feature is automatically available on clients running Windows XP. On clients running Windows 98, Windows 98 Second Edition, or Windows Me, you must run XP's Network Setup Wizard to enable the gateway. If you have a Windows XP CD-ROM, you can run the Wizard from it. Otherwise, create a network setup disk containing the Wizard files.
Enabling ICS on the Server Computer

You can enable ICS either manually or by using XP's Network Setup Wizard. 

To use the Wizard, see our page on Server Setup Using the Network Setup Wizard. You must use this method if you need to create a network setup disk.

You can also enable ICS manually for a dial-up Internet connection or enable ICS manually for a broadband Internet connection.
Configuring ICS Client Computers

Now configure the other networked computers as ICS clients. Follow these links for computers running Windows 95 or Windows 2000 Professional. For Windows 98, Windows 98 Second Edition, Windows Me, or Windows XP, stay with these instructions for XP Client Wizard.

How to enable Internet Connection Sharing?

Setup procedures

To enable Internet Connection Sharing on a network connection, follow theses steps: 

1.Click Start, click Control Panel, and then double-click Network Connections.

2.Click the local area network (LAN) connection or click the dial-up networking connection that you want to share (that is, the one that connects to the Internet), and then under Network Tasks, click Change settings of this connection.

3.On the Advanced tab, click to select the Allow other network users to connect through this computer's Internet connection check box.

4.If this is a dial-up networking connection, and you want the connection to be automatically dialed when another computer on your network tries to connect to the Internet, click to select the Establish a dial-up connection whenever a computer on my network attempts to access the Internet check box.

5.If you want to permit other network users to enable or to disable the shared Internet connection, click to select the Allow other network users to control or disable the shared Internet connection check box.

6.Under Internet Connection Sharing in Home networking connection, select the connection that connects the computer that is sharing its Internet connection to the other computers on your network.


Note that to enable Internet Connection Sharing in Windows XP, you must have administrative rights.

Important: When you enable Internet Connection Sharing, the network adapter that is connected to the home network or to the small-office network receives a new static IP address of 192.168.0.1, with a subnet mask of 255.255.255.0. Existing TCP/IP connections on the network may be lost and must be reestablished.

Make your windows as a wireless router


Set up a wireless network without a router

Wireless networks are helpful because they let you use your computer and connect to the Internet anywhere in your home or office. However, most wireless networks use a wireless router, which can be expensive. If you have more than one computer, you can set up a wireless network without buying a wireless router and save yourself some money.

In a traditional wireless network, a wireless router acts as a base station, much like the base station for cordless phones. All wireless communications go through the wireless router, allowing nearby computers to connect to the Internet or to each other.

Ad hoc wireless networks work more like walkie-talkies, because the computers communicate directly with each other. By enabling Internet Connection Sharing on one of the computers, you can share Internet access.


Ad hoc networking might seem like a much smarter alternative to using a wireless router, but it does have a couple of disadvantages:• 
If the computer connected to the Internet is shut down, all computers that are part of the ad hoc network lose their Internet access.

To connect to the Internet, one computer always needs a wired network connection.

To connect your computers to the Internet using an ad hoc wireless network, follow these steps 

1.Enable Internet Connection Sharing on the Internet-connected computer. You can skip this step if you don't need to access the Web.

2.Set up the ad hoc wireless network on the Internet-connected computer.

3.Add your other computers to the wireless network.

How to enable Internet Connection Sharing?

On networks with wireless routers, the router has the important job of forwarding communications from the computers on your home network to the Internet. On ad hoc networks, you must designate one computer to serve this role. The computer you choose must have a wired connection to the Internet, and it should be left on whenever you want to be able to use your other computers.


How to set up the first computer?

To set up an ad hoc wireless network that allows computers to share an Internet connection without a router

1.Make sure you have a wireless network adapter.
2. Click Start, and then click Control Panel.
3. Under Pick a category, click Network and Internet Connections.

4. Under or pick a Control Panel icon, click Network Connections.5. Right-click your wireless network connection, and then click Properties.

6. In the Wireless Network Connection Properties dialog box, click the Wireless Networks tab.

7. On the Wireless Networks tab, under Preferred networks, click Add.

8. In the Wireless network properties dialog box, on the Association tab, type the name of your ad hoc wireless network in Network name (SSID) box (shown in step 10). For example, you could name your wireless network MyHomeNetwork.

9. Clear the The key is provided for me automatically check box and select the This is a computer-to-computer (ad hoc) network check box.

10. Create a 13-digit password and type it in both the Network key and Confirm network key boxes. For the best security, include letters, numbers, and punctuation. Then click OK.

11. Click OK again to save your changes.

NOTE: Please make sure that you have a wireless network adapter in the computer you want to make as a router to share internet connections. and also make sure it has another network adapter for its internet connection source.. refer to the first image diagram above..


tags

Friend Connect